Once your starter section is anchored level on the shoreline, the true genius of Pier of d'Nort engineering comes to life. Forget about heavy lifting, rounding up a neighborhood work crew, or freezing in chest-high waders. By mastering our simple "Clip and Flip" method, a single person can build out an entire pier system while remaining completely dry.
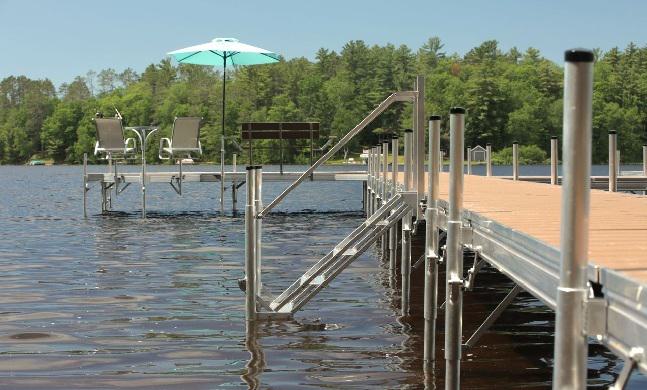
Here is the exact step-by-step technique to install your dock like a seasoned pro.
The Step-by-Step "Clip and Flip" Installation Procedure
1.The First Panel Slide:Expose the connection points.
Drop the first decking panel into your anchored starter section. Take the second panel and slide it forward along the frame tracks, stopping approximately 6 inches from the very end.
Pro Tip: Leaving that 6-inch gap keeps the round leg sleeve tubes exposed, providing the clearance needed to lock the next frame into place.
2.The Balance and Carry:Optimize lifting leverage.
Walk back to your shoreline staging area and step into the center of the open frame. Flip the section upside down so the large welded latch hooks face forward (toward the lake) and the flat-folding legs face you. Grip the side runners at the center balance point and lift—this distributes the lightweight aluminum weight evenly to eliminate back strain.
3.Clip and Flip (The Splash):Engage hooks and extend legs.
Walk out onto your stable starter section. Standing safely on the dry deck boards, lower the frame forward and clip the welded latch hooks directly over the exposed leg sleeve tubes. Keep fingers clear of the engagement zone, then tip the frame forward over the water. As it flips down, gravity automatically unfolds the dual-hinged legs while the flip-in latch plates lock the frames together.
4.Lock the Legs:Secure the underwater hinges.
Once the section rests in the water, use your foot or a reaching tool to tap the leg bracket hinge forward until you feel a distinct mechanical snap. This locks the leg hinge straight and stabilizes the underwater support structure.
5.Top-Down Leveling:Level without getting wet.
Ensure the footpads rest flat on the lakebed. Place a 1/2-inch wrench onto the top-accessible cincher bolt on the leg sleeve and pull up slightly to release the internal cam clutch. Pull the frame upward until level with the previous section, then release/tighten—the high-friction cam locks down instantly.
6.Complete the Deck & Repeat:Close the gap and extend.
Reach down and slide the remaining panel fully into place to close the 6-inch gap. Drop in the remaining deck panels for this section, sliding the last one forward to leave the 6-inch gap exposed for your next section. Repeat frame-by-frame until complete.
Installation Efficiency Breakdown
| Workflow Stage | Pier of d'Nort "Clip & Flip" | Traditional Sectional / Pipe Docks |
| Water Entry | 0% In-Water: Completed entirely from dry deck | 100% In-Water: Requires chest waders or swimming |
| Crew Required | 1 Person: Lightweight balanced handling | 2 to 4 People: Heavy lifting and holding in place |
| Leg Leveling | Top-Side Cam: Fast wrench adjustment above water | Submerged Screws: Underwater wrenches & set screws |
| Safety Profile | High: No submerged lifting or heavy machinery | Low: Cold water exposure, heavy lifting, slip hazards |
Pre-Installation Safety & Technique Checks
Keep these diagnostic checks in mind during your installation to maintain smooth workflow momentum:
- The Finger Safety Clearance Check: Always keep your hands positioned on the outer side runners when tipping the frame forward to keep fingers completely free of the hinge engagement zone.
- The Leg Snap Verification: Never step onto a newly flipped section until you have confirmed the leg hinge bracket is pushed past its locking indent. You should feel or hear a firm mechanical lock.
- The Continuous Level Test: Check each section with a level before sliding the final decking panels into place. Adjusting the top-side cam is much easier before walking out onto the next span.